Dasturlash
Semantik Kod Qidiruv Uchun RAG Pipeline Qurilishi
JetBrains AI jamoasi semantik kod qidiruv platformasi yaratish jarayonini, parsing, chunking va vectorization bosqichlarini tahlil qiladi.
Do'stingiz sizning blog postingizni ko'rib chiqmoqchi bo'lsa-da, u faqat localhost:8080 da ishlaydi. Bu muammo uchun ko'plab vositalar mavjud. Ba'zilari, masalan, ngrok yoki Cloudflare Quick Tunnels, tijorat xizmatlari sifatida ishlaydi. Boshqalari, masalan, frp yoki localtunnel, o'ziga xos klient talab qiladi. Ammo, ba'zilar faqat oddiy SSH klient talab qiladi, lekin maxsus SSH serverga bog'liq bo'ladi, masalan, sish. Bu maqolada faqat OpenSSH va Nginx yordamida o'ziga xos yechimni amalga oshirishga harakat qilamiz.
Birinchidan, uzoq serverdagi portdan lokal xizmatga ulanishlarni yo'naltirish kerak:
$ ssh -R 0:localhost:8080 http-over-ssh
Allocated port 41535 for remote forward to localhost:8080
https://6J3jK1WmB15c6WmjW_X-Wg--1789928654@p41535.ssh.luffy.cx/
ssh -N -R 0:localhost:8080 web02.luffy.cx
Ushbu buyruq ijro etilganda, server 0 portini belgilagan bo'lsa, bo'sh portni ajratadi. Keyin, Nginx konfiguratsiyasini sozlashimiz kerak, bu yerda https://p41535.ssh.luffy.cx so'rovlarini http://127.0.0.1:41535 ga yo'naltiradi:
$ ssh -N -R 0:localhost:8080 web02.luffy.cx
Allocated port 41535 for remote forward to localhost:8080
server {
    listen 0.0.0.0:443 ssl;
    listen [::0]:443 ssl;
    server_name ~^p(?\d\d\d\d\d)\.ssh\.luffy\.cx$;
    location / {
        proxy_pass http://127.0.0.1:$port;
    }
}
Shuningdek, *.ssh.luffy.cx uchun DNS yozuvlarini qo'shish va Let's Encrypt orqali wildcard sertifikat olish kerak:
server {
  listen 0.0.0.0:443 ssl ;
  listen [::0]:443 ssl ;
  server_name ~^p(?<port>\d\d\d\d\d)\.ssh\.luffy\.cx$;
  location / {
    proxy_pass http://127.0.0.1:$port;
  }
}
*.ssh.luffy.cx. CNAME web02.luffy.cx.
ssh.luffy.cx. CAA 0 issuewild "letsencrypt.org"
_acme-challenge.ssh.luffy.cx CNAME ssh.luffy.cx.acme.luffy.cx.
Port faqat ma'lumotni maxfiylikni saqlash uchun ishlatiladi. Boshqa yo'naltirish yechimlari domen nomiga tasodifiy qator qo'shadi, bu yerda bu portdan foydalaniladi. ngx_http_secure_link_module yordamida bu konfiguratsiyani biroz xavfsizlashtirish mumkin. Bu modul bir nechta qiymatlar, jumladan sirli so'zni hisoblab, so'rovdagi hash bilan solishtiradi. Hash base64 kodlanganligi sababli, uni domen nomiga joylashtirib bo'lmaydi, chunki u harfga sezgir emas. O'rniga, uni URL sifatida foydalanuvchi nomi bilan birga joylashtiradi:
*.ssh.luffy.cx.               CNAME web02.luffy.cx.
ssh.luffy.cx.                 CAA   0 issuewild "letsencrypt.org"
_acme-challenge.ssh.luffy.cx  CNAME ssh.luffy.cx.acme.luffy.cx.
https://6J3jK1WmB15c6WmjW_X-Wg--1789928654@p41535.ssh.luffy.cx/en/blog
Klient HTTP asosiy autentifikatsiyasidan foydalanib, foydalanuvchi nomini serverga yuboradi. Bu ko'plab HTTP klientlari, jumladan curl bilan ishlaydi. Nginx $remote_user o'zgaruvchisida foydalanuvchi nomini taqdim etadi. Modul hash va muddatni ajratish uchun map direktivasidan foydalanadi:
$ sysctl -n net.ipv4.ip_local_port_range \
>   | awk '{print $1"—"$2" ≈ "log($2-$1+1)/log(2)" bits"}'
32768—60999 ≈ 14.785 bits
map $remote_user $httpssh_link {
    "~^([-_A-Za-z0-9]{22})--([0-9]+)$" "$1,$2";
}
Server konfiguratsiyasini to'ldirish:
https://6J3jK1WmB15c6WmjW_X-Wg--1789928654@p41535.ssh.luffy.cx/en/blog
        ╰─────────┬──────────╯  ╰───┬────╯  ╰─┬─╯             ╰──┬───╯
                hash             expires    port               path
server {
    # […]
    location / {
        secure_link $httpssh_link;
        secure_link_md5 "$secure_link_expires $port ZuPerS3cr3!";
        if ($secure_link = "") {
            add_header WWW-Authenticate 'Basic realm="tunnel"' always;
            return 401;
        }
        if ($secure_link = "0") {
            return 410;
        }
        proxy_pass http://127.0.0.1:$port;
        proxy_set_header Host $host;
        proxy_set_header X-Forwarded-For $proxy_add_x_forwarded_for;
        proxy_set_header Authorization "";
        proxy_http_version 1.1;
        proxy_set_header Upgrade $http_upgrade;
        proxy_set_header Connection "upgrade";
        proxy_buffering off;
        proxy_read_timeout 30m;
    }
}
Asosiy qiyinchilik OpenSSH tomonidan ajratilgan vaqtinchalik portni topishdir, chunki u hech qanday muhit o'zgaruvchida ko'rsatilmaydi. Bu muammoni hal qilish uchun, biz sshd-session jarayonlarining ajdodlarini qidiramiz:
map $remote_user $httpssh_link {
  "~^([-_A-Za-z0-9]{22})--([0-9]+)$" "$1,$2";
}
server {
  # […]
  location / {
    secure_link $httpssh_link;
    secure_link_md5 "$secure_link_expires $port ZuPerS3cr3!";
  }
}
pids=$(
    pid=$$
    while [ "$pid" -gt 1 ]; do
        line=$(ps -o comm=,pid=,ppid= -p "$pid")
        echo "$line"
        pid=${line##* }
    done | awk '$1 == "sshd-session" { printf "pid=%s,\n", $2 }'
)
if [ -z "$pids" ]; then
    echo "not an ssh session" >&2
    exit 1
fi
Keyin, biz ushbu sshd-session jarayonlariga bog'liq teskari portlarni olishimiz kerak:
map $remote_user $httpssh_link {
  "~^([-_A-Za-z0-9]{22})--([0-9]+)$" "$1,$2";
}
server {
  listen 0.0.0.0:443 ssl ;
  listen [::0]:443 ssl ;
  server_name ~^p(?<port>\d\d\d\d\d)\.ssh\.luffy\.cx$;
  location / {
    secure_link $httpssh_link;
    secure_link_md5 "$secure_link_expires $port ZuPerS3cr3!";
    if ($secure_link = "") {
      add_header WWW-Authenticate 'Basic realm="tunnel"' always;
      return 401;
    }
    if ($secure_link = "0") {
      return 410;
    }
    proxy_pass http://127.0.0.1:$port;
    proxy_set_header Host $host;
    proxy_set_header X-Forwarded-For $proxy_add_x_forwarded_for;
    proxy_set_header Authorization "";
    proxy_http_version 1.1;
    proxy_set_header Upgrade $http_upgrade;
    proxy_set_header Connection "upgrade";
    proxy_buffering off;
    proxy_read_timeout 30m;
  }
}
ports=$(sudo -n ss --listening --numeric --tcp --processes --no-header \
    | grep -F "$pids" \
    | awk '{ print $4 }' | awk -F: '{ print $NF }' \
    | sort -un)
if [ -z "$ports" ]; then
    echo "no forwarded port, use ssh -R 0:localhost:PORT" >&2
    exit 1
fi
Nihoyat, biz URL'larni ko'rsatamiz va sessiyani ochiq qoldiramiz:
lifetime=86400
secret='ZuPerS3cr3!'
expires=$(( $(date +%s) + lifetime ))
for port in $ports; do
    token=$(printf '%s %s %s' "$expires" "$port" "$secret" \
        | openssl md5 -binary \
        | openssl base64 \
        | tr +/ -_ | tr -d =)
    echo "https://$token--$expires@p$port.ssh.luffy.cx/"
done
sleep infinity
Bu skriptni serverda http-over-ssh sifatida o'rnatamiz va ~/.ssh/config faylga quyidagi kirishni qo'shamiz:
Host http-over-ssh
Hostname web02.luffy.cx
User your_username
RemoteForward 0 localhost:8080
Asl manba: vincent.bernat.ch

JetBrains AI jamoasi semantik kod qidiruv platformasi yaratish jarayonini, parsing, chunking va vectorization bosqichlarini tahlil qiladi.
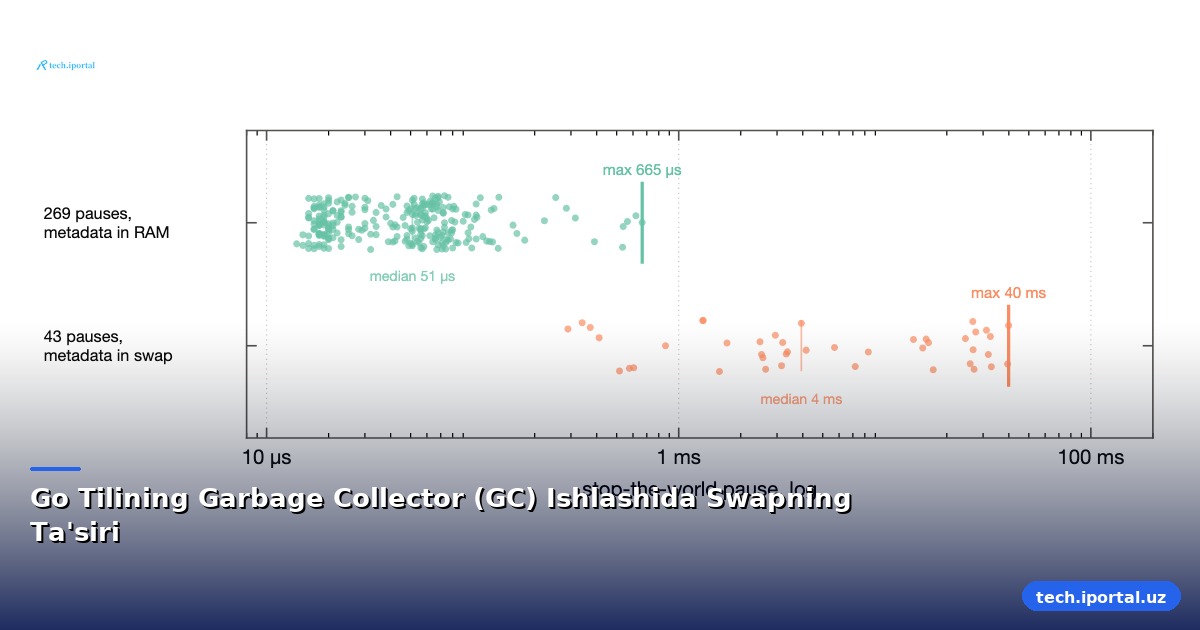
Go tilida ishlab turgan dasturlar uchun swap ishlatish, xususan, Go tilining garbage collector (GC) ishiga ta'sir ko'rsatishi mumkin. Bu maqolada swapning Go GC ishiga ta'siri to'liq tahlil qilinadi.
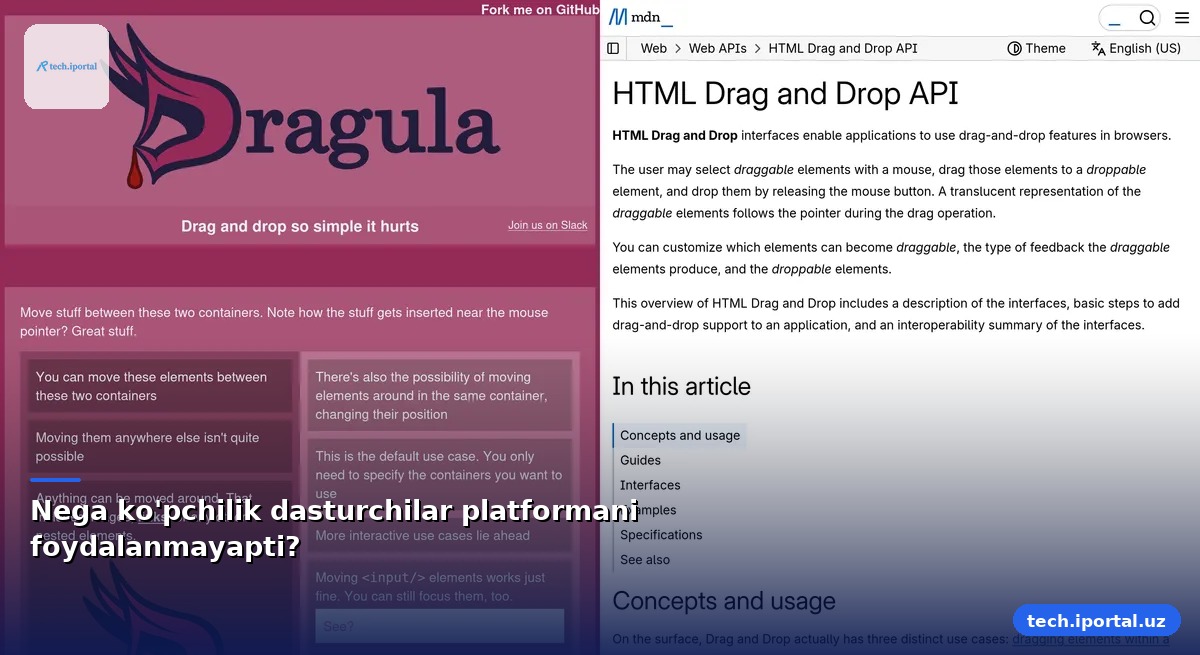
Web dasturchilari platformadan foydalanishni afzal ko'rishlari kerak, lekin ko'pchilik bu amaliyotdan voz kechadi. Bu qanday voqea va uning sabablari haqida.

Valve Linux grafik drayveri jamoasining Timur Kristof eski AMD GCN 1.0/1.1 kartalarini AMDGPU ga ko'chirish, Vulkan qo‘llab‑quvvatlash va 30% tezlik oshirishni ta’minlaydi.